This knitted owl jumper is my latest side project. I’m immensely proud of it because I’ve wanted to knit a jumper for a long time. I considered my crochet skills alot stronger than my knitting skills, so last year I tried to improve them. I started off with socks and later in the year knitted some Norwegian Totoro mittens; which gave me the confidence to move onto a jumper!
The pattern
o w l s jumper by Kate Davis (£3.95). The pattern is really well written and very easy to follow, even for a jumper novice like myself.
Materials
- Wool: I used 6 balls (for size 2 in pattern) of Rowan Purelife: British Sheep Breeds Chunky in 953: Dark Grey Welsh.
- Needles: ‘Pony Plastic’ 100cm aluminium circular needles in 6mm and 6.5mm.
Which size circular needles to knit a jumper?
I got really confused as to what length circular needles to buy. They range from 40cm to 100cm. I ordered 100cm and started knitting only to realise they were too long. This mean’t my stitches were getting stretched – and this was the bottom ribbing so I’d be really stuck once I reached the yoke. I went to my local knitting shop and the lady in there told me that 100cm was a good length to buy because I could knit anything on them using the Magic Loop Method. This method is actually really simple as long as you make sure your stitches don’t get twisted on the first 3-4 rows (bit of a faff but worth the perseverance). After that it’s ‘plain sailing’.
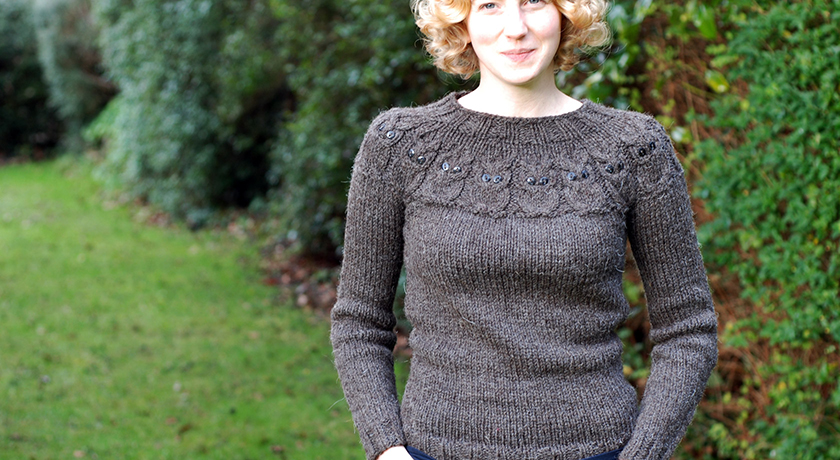
My jumper
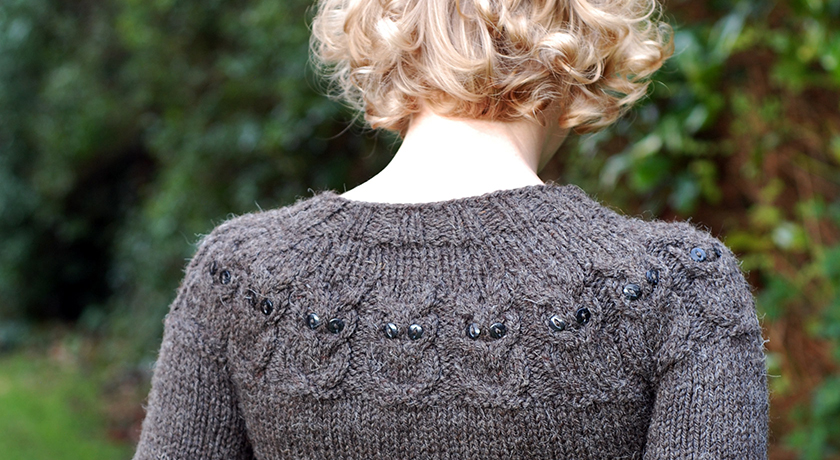
And here it is, my owl jumper!
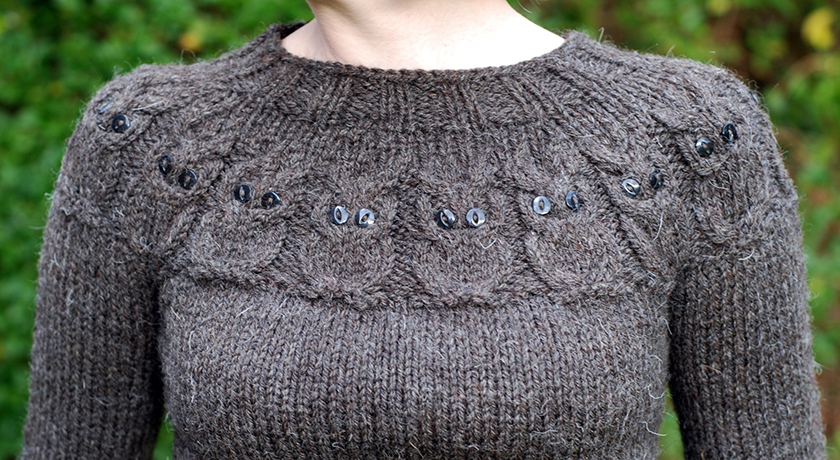
These owls were lovely to make. Just a few rows of cable knits. I found it helpful to put a scrap bit of red yarn to indicate the end of an owl to reduce the likelihood of miscounting stitches. Using markers mean’t I was only keeping track of 10 stitches at a time.
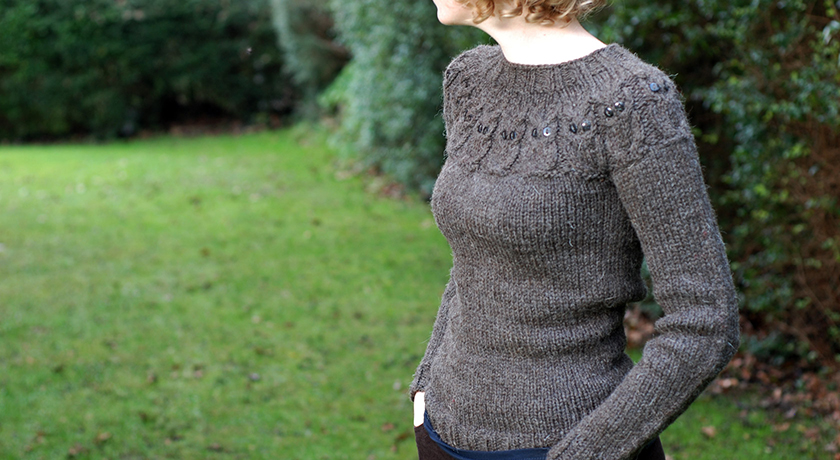
This pattern has a beautiful fit. The majority of it is worked on 6.5 needles, apart from the ribbing.

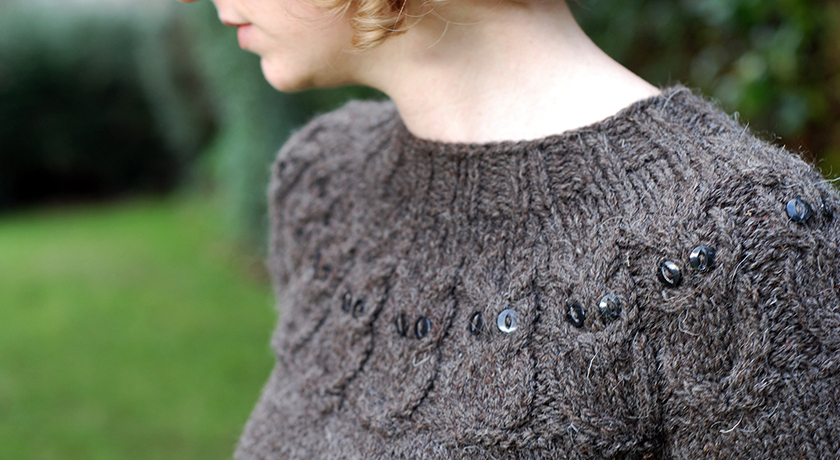
A few short rows give the back neckline a lovely shape:
And that’s my jumper. I love this pattern and wool so much I’m going to make myself another one in light grey or cream.
Grafting the jumper armpits
The pattern said to ‘graft’ the underarm holes. These were live stitches I’d tied together with waste yarn. All I did was place the stitches evenly over 2 double pointed needles (dpn’s) and use Kitchener stitch to graft them together, which left an invisible underarm seam. I don’t know whether this was the right method to use not, so if anyone knows of a better way, please drop me a comment below.
Blocking the jumper
I’m quite lazy with blocking and generally don’t bother unless it’s absolutely necessary, but I did this time because it’s a garment. I was worried about this stage in case the jumper ended up too big, or worse, too small from a blocking error. I put my jumper in cool water and wool wash for about 10 mins until it was soaked all the way through. Loads of pale brown came off in the water and the jumper started to smell really sheepy at this stage!
I gently squeezed the excess water out, without twisting the wool up too much and wrapped it in a towel. It was very wet and I was worried it would take days to dry so I used a technique I found on YouTube. Place the jumper on a towel, rolled it up into a sausage shape and then walk up and down it a few times.
I’d cast on and knitted the bottom ribbing a little tight but was able to correct this by gently pinning it into position.
Did you spot the mistake?
I cast off my last stitch and was admiring my handy work when I noticed a cabling error on the 3rd owl from the left (photo 3). Double d’oh! It doesn’t notice too much but I was so annoyed with myself. But, not bad for my first attempt and at least it fits.
** Update – Jan 2014 **
I’ve made a second owl jumper and written a blog post with links to tutorials – if you are a beginner some of them could be handy.
What a lovely sweater! It looks great 🙂
Thank you Lucy 🙂
Thanks for this post. I’m just finishing mine and wasn’t sure if the short rows are meant to be in the front or back. Your post has just confirmed what I preach had on my needles but gave me a piece of mind !