
Few things get me feeling more festive than making a wreath for our front door. When we moved to our flat a few years ago we had to cut bits off the back of the tree to fit it in the space we had. I didn’t want to waste them so I made a wreath… and have made one every year since.

This year Turtle Mat got in touch and asked if I’d like to get involved in their Craftmas craft challenge – wreath making. I said yes of course! Scott and I both like simple, rustic things so mine is a simple take on the traditional wreath chock full of spruce and berries. I’ve put together a tutorial in case you fancy making one of your own.
You will need:
- 1 wreath ring
- Sticks and twigs – longer thinner ones are best as they bend easily
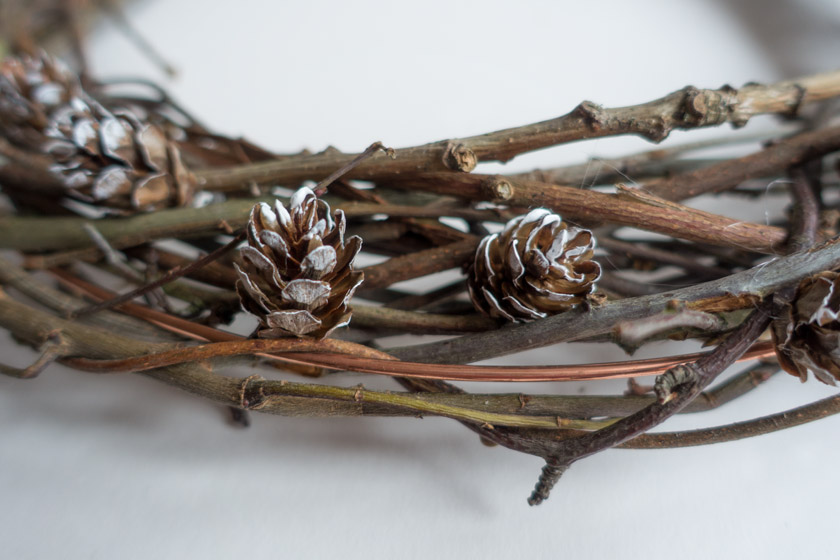
- Small pinecones
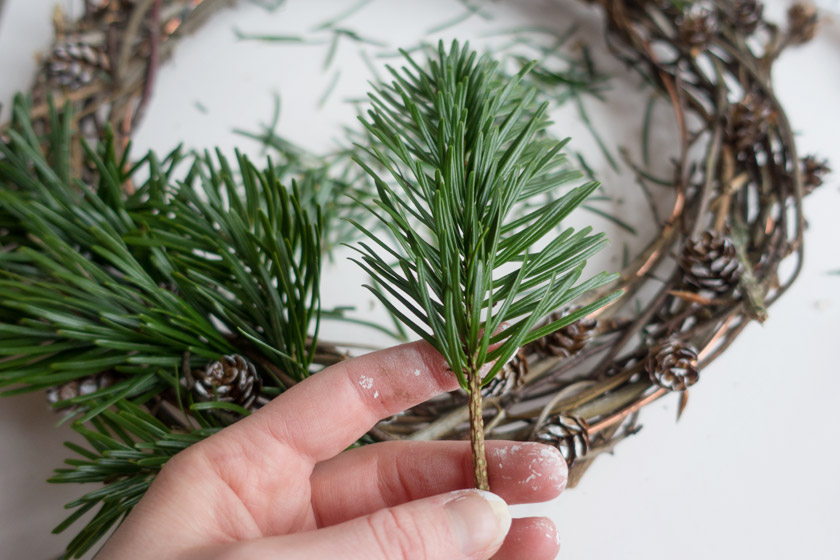
- Spruce offcuts
- 1 metre of ribbon
- White acrylic paint
- Glass berries/real berries
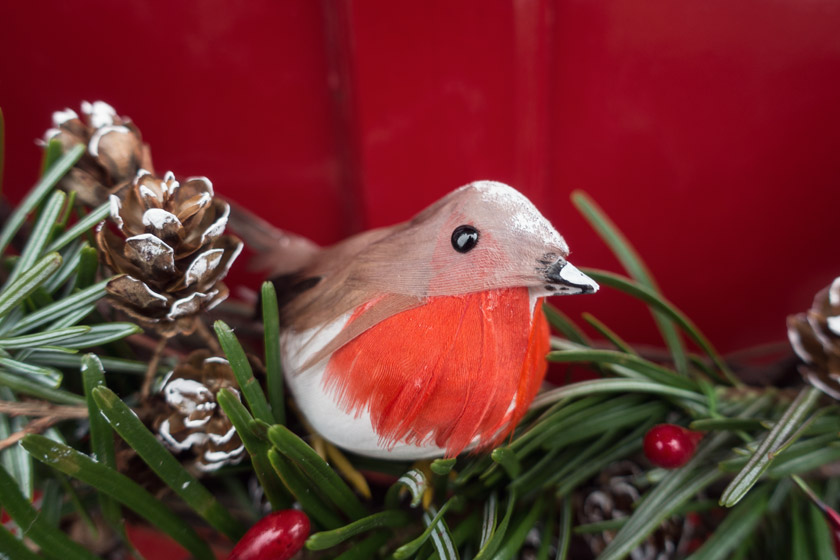
- 1 robin (not a real one, obviously)
- Glue gun
How to make a rustic Christmas wreath
1. Weave the sticks
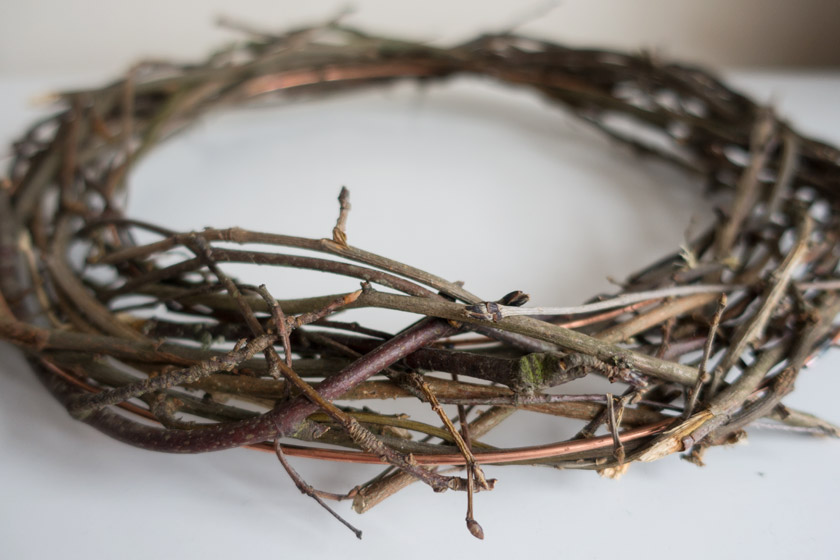
With a ring: weave the sticks over, around and under eachother until you have the look you desire. I used the copper ring provided in the supplies I was sent.
Without a ring: take two of the longest sticks, shape them into a rough circle and tie together. It won’t be perfect but that doesn’t matter at this stage because the shape will become rounder as you weave in more sticks.
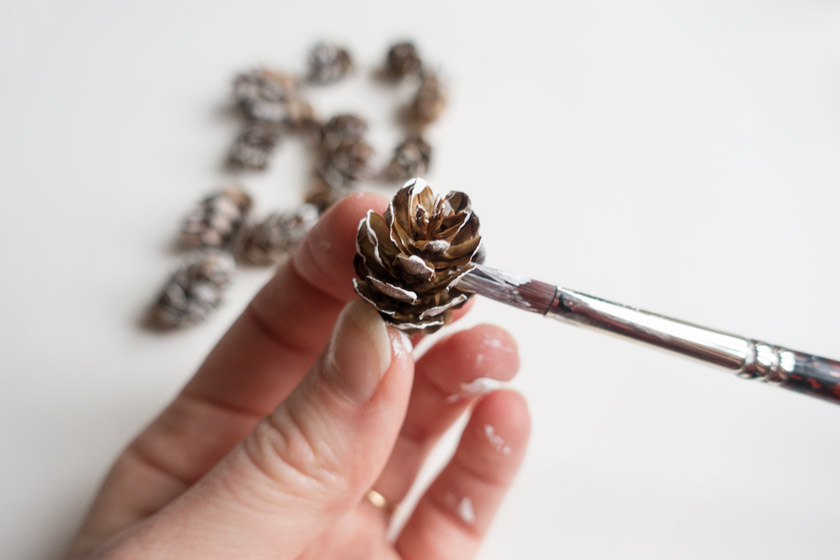
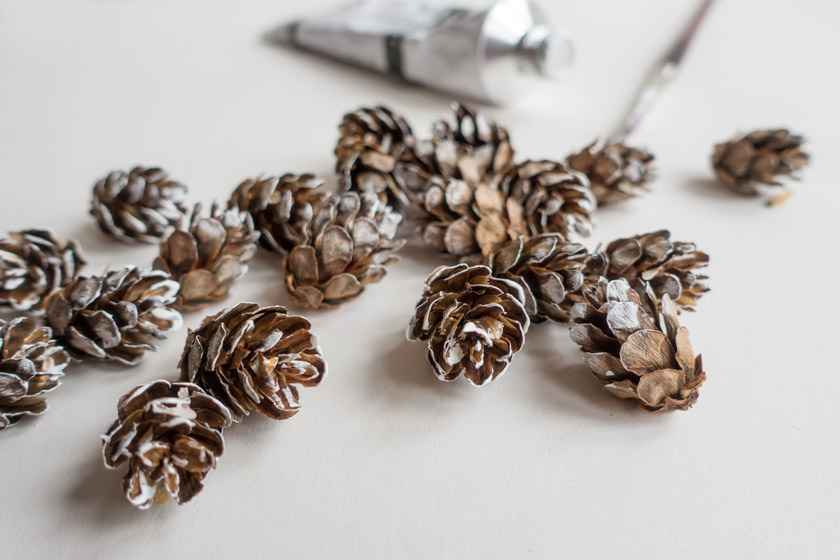
2. Paint the pinecones
Use a paint brush to apply white acrylic paint to the pinecones. Start at the top, dabbing paint on. This will take the excess off the brush. Then wipe from the top, down the sides of the pinecone. Painting them this way will stop the paint looking caked on.
3. Glue pinecones to the wreath
Once the pinecones are dry use a glue gun to attach them to the wreath. Watch your fingers, the glue is like molten lava!
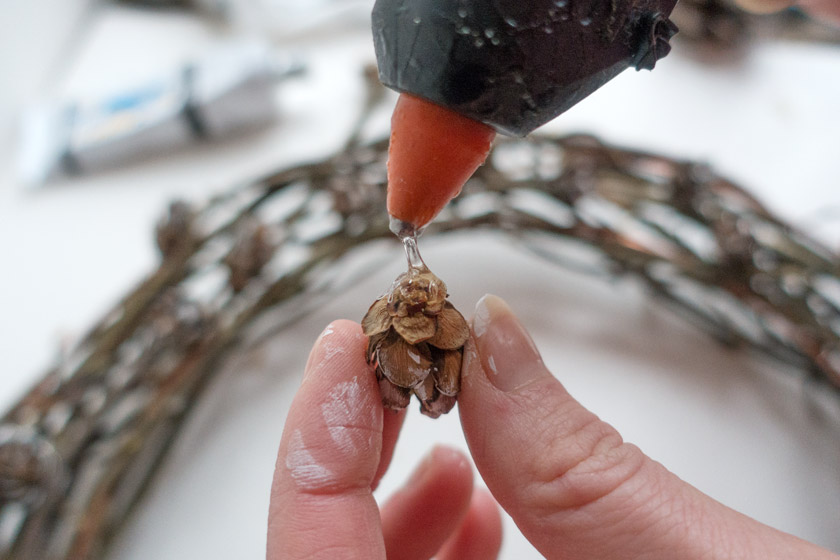
Use a good dollop of glue and press them on firmly. Try to nestle them between the sticks so you can’t see the glue joins.
4. Weave in spruce
Snip some spruce branches and remove the needles from one end. Now for the run part! Weaving! I wanted my wreath to look a bit more minimal so I only put spruce on a third of the ring but you can go all the way around if you want.
5. Add berries
I used glass berries on wire but real ones would look just as good.


6. Tie a bow
Tie a big bow to the top. If you tie another piece of ribbon around the middle of the bow and the wreath it will give you something secure to hang it from – especially important if it’s going to be hanging on the front door in the wind, like this one!

I love this hessian ribbon. Nice and rustic with a subtle bit of gold sparkle for Christmas.
Ta dah!!!
Here is the finished wreath!


I put a bit of acrylic on the robins head and beak to help him match the pinecones.

Fingers crossed it doesn’t get blown away between now and Christmas 🙂
Turtle Mat asked me to be involved in their Christmas craft challenge; to make a handmade Christmas wreath. They supplied me with a box of basic craft materials and a voucher to buy additional materials. All opinions, ideas and photography are my own.
Beautiful!
Thank you! 🙂
Your wreath looks really beautiful, I have never seen one with a robin it’s a lovely idea.?
Thank you Tina! I wasn’t going to use him at first but once I’d put everything together, it seemed like a good spot for him.
this is prettier than what I saw in the store last week! seriously, how much? :>
Thanks so much 🙂
This looks ace! I’m going on a wreath making course on the weekend and i’m so excited about it…even more so now after seeing this. The Robin Goch just finishes it off perfectly. Goch = Red 😉
I’ll have you fluent before you know it!
Diolch Cerys <-- Hoping I've successfully said 'thank you'. If not blame Google Translate. I just tried to say 'Goch' out loud, I think you would have laughed at my attempts...
‘Not a real one obviously’
Spoil sport.
Looks great Gemma x
Haha! The females are going to be fighting over this one…