The Christmas prep is well underway. My friend Kat and I have been busy making salt dough Christmas decorations for our trees this year. Here’s what we did:
Dough
To make your dough you will need:
- 2 cups plain flour
- 1 cup of salt
- 1 cup of cold water
Mix together to create a moist dough (but make sure it’s not too wet).
Cooking times
75C (170F) for 3 hours. Keep an eye on your decorations so they don’t burn. They may take more or less time depending on the thickness of your dough.
The fun bit!
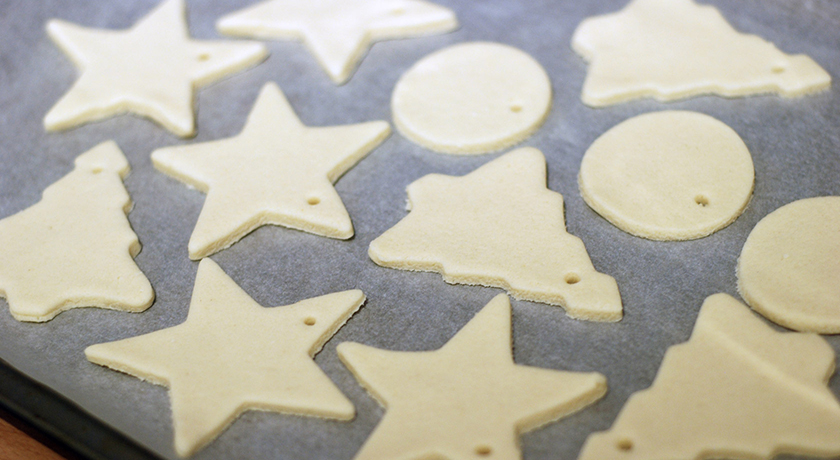
We started off making our dough and cutting out our shapes (whilst listening to Christmas music of course).

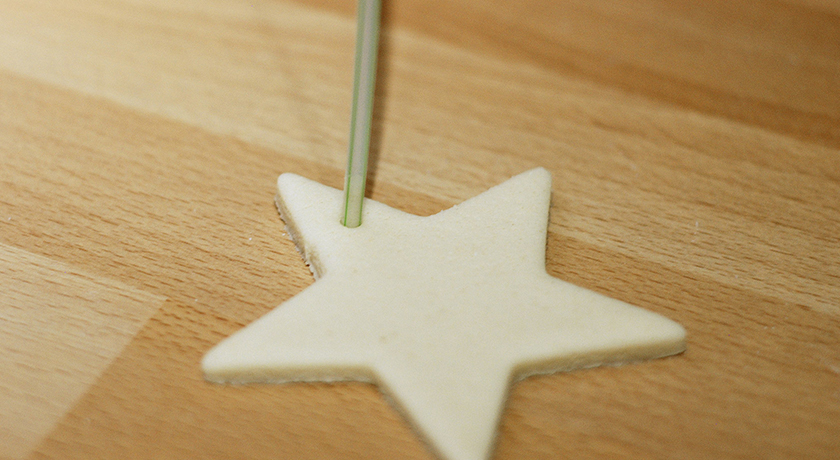
Used a straw to make a hole for the string.
Layed out all the dough shapes on an oven tray and baked them for around 3 hours.
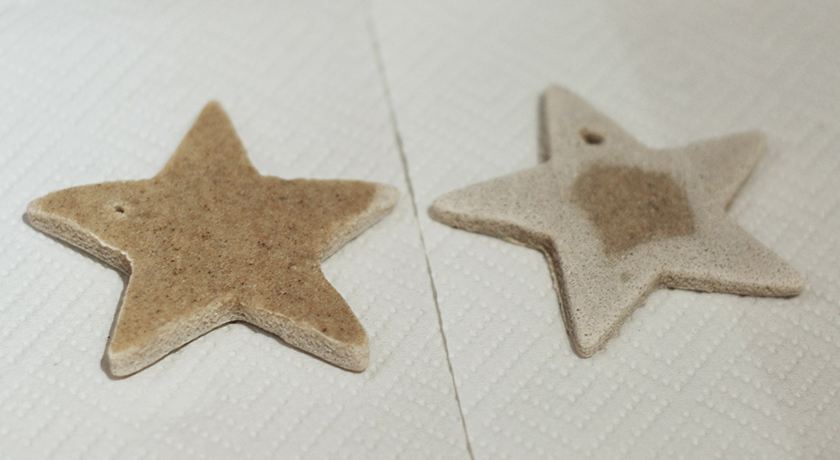
The first batch we made took a long time to dry. The front dried out quickly but the back stayed quite damp even though we flipped them over half way through cooking. They did eventually dry out but it took a couple of weeks because we rolled the dough too thick (5-6mm).
We also had slight rippling on the back, which is where the top was cooking hard but moisture was trapped on the side face down on the tray. It looks more noticeable in this photo because of the lighting.
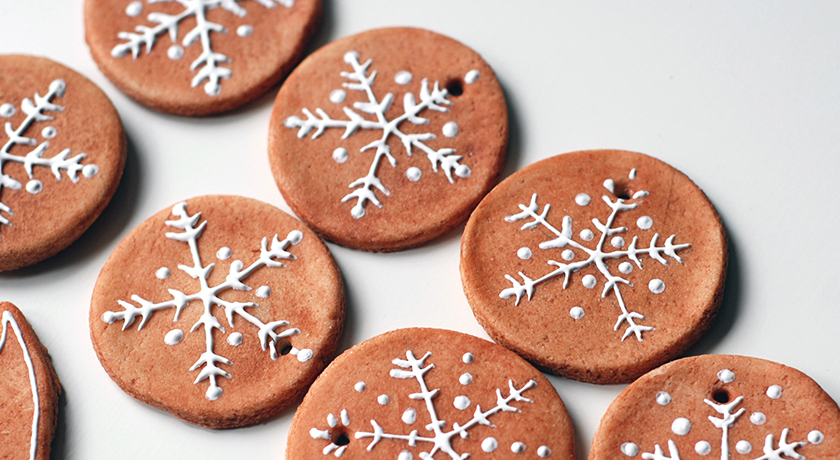
I painted my shapes a gingerbread colour with gouache and let them dry. I used 1 part red, 2 part yellow and 1 part brown, which creates a life-like gingerbread colouring.

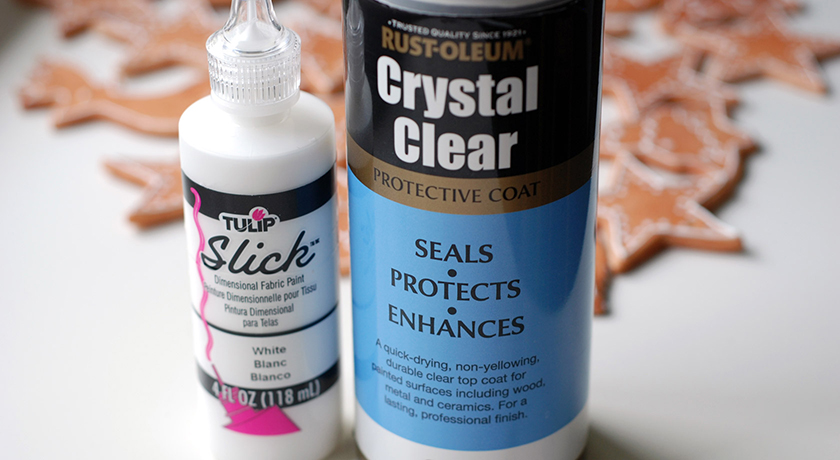
I used Tulip Slick Paint for the icing. This paint is great, it puffs up a little as you apply it and dries hard. If you make a mistake you can peel the paint off once it’s touch dry and start again.

And these are my gingerbread decorations! I’m really pleased with how they turned out.

I had a few round shapes left over, which I turned into Scandinavian style snowflakes based on the Christmas wrap I made last year.
Once the shapes were completely dry, I varnished them with a matt Rust-Oleum spray.
Apply varnish after your decorations are painted and dry. This stops the decorations absorbing any moisture in the air. Without glaze, the decorations will crumble over time. If you use acrylic paint, you can skip the varnish stage.
This effect came from a happy accident. I painted the decorations and left them on newspaper. I thought they were dry, so I flipped them over and painted the other side. They stuck to the newspaper a little and some of the paint peeled off. This photo doesn’t capture it very well but they look like weathered wood.

And this is a gift for the dog in the family!

These decorations don’t have to be just for Christmas, you can also make seasonal ornaments for your house all year round.
I think they are beautiful! They really do look like the “real” thing!
Howdy! I just want to give you a huge thumbs up for the great information you have here on this post.
I am returning to your web site for more soon.
you posted 5 to 6 hours baking time, then you said 3 hours. Which of these is correct?
Well spotted Donna 🙂 If you’ve rolled the dough out fairly thin they should take around 3 hours.
Brilliant instructions. Thank you, this is just what I’ve been looking for. I wanted to put them on garlands with bells and ribbon but my question is if I wrap them up and store them in a dry place can they be used again year after year?
Yes you can. I’ve had mine for 2 years and they still look as good as new. I’ve put a small silica sachet in the box to make double sure they stay dry but you could also put some rice in (it’ll do the same thing). Feel free to post a link to your garlands when they are done, I’d love to see them 🙂
Thank you Gemma, that’s really great news! Whooppee! I’ll get straight on to it.
Wow, these are just what I have been looking for! I am doing a “gingerbread house” theme for my Christmas party, and these would look fabulous on the tree, along with some candy canes and swirled lollipops. Thanks for sharing!!!
Thanks for sharing this wonderful tutorial . I really appreciate it !!
Love also the pictures, looks all lovely 🙂
Thumbs up!!